
The Hidden Gold on Our Homestead: Mealworm Frass – Nature’s Perfect Soil Booster
Frass, a well balance soil amendment
Hello, fellow gardeners and homesteaders! Here on our 9-acre wooded homestead in White Cloud, Michigan, we’re passionate about closing the loop and turning what others might see as waste into something truly valuable. One of our absolute favorite examples? Mealworm frass—the polite term for the manure, shed skins, and leftover bedding from our thriving mealworm farm. This humble by-product has become a cornerstone of our regenerative gardening, and we’re thrilled to now offer it for sale in our Squarespace store so you can experience the benefits too!
What Exactly Is Frass?
Frass is a powerhouse mix of:
Nutrient-rich mealworm droppings (balanced in nitrogen, phosphorus, potassium, and essential micronutrients)
Finely ground wheat bran remnants
Chitin-rich shed skins from the molting process
Unlike hotter manures that need long composting, our frass is mild, crumbly, and ready to use right away. The star ingredient is that chitin—it naturally triggers plants’ immune systems, helping them build resistance to pests like aphids, spider mites, and even some fungal diseases. All of this without a drop of synthetic chemicals.
A Game-Changer for Our Loofa Sponge Garden
We’ve seen frass work its magic firsthand, especially in our loofa gourd project. Last year’s trial run with just two plants gave us twenty beautiful sponges, and we credited much of that success to the frass we worked into the soil. The vines grew vigorously, the leaves stayed deep green and healthy, and we noticed far fewer insect issues than in other beds. For our big 2026 expansion—a shaded loofa tunnel built over arched cattle panels with room for twenty robust plants—frass is playing an even bigger role. We’re blending it generously with aged pig and chicken manure plus leaf compost to create rich, living soil in our new raised beds. That chitin boost is especially exciting for loofas, which can attract squash bugs and vine borers in Michigan summers. Early signs from last season suggest the plants’ natural defenses get a real leg up, leading to stronger vines and heavier harvests. We can’t wait to walk through that tunnel this fall loaded with hanging gourds!
How We Produce and Harvest Frass
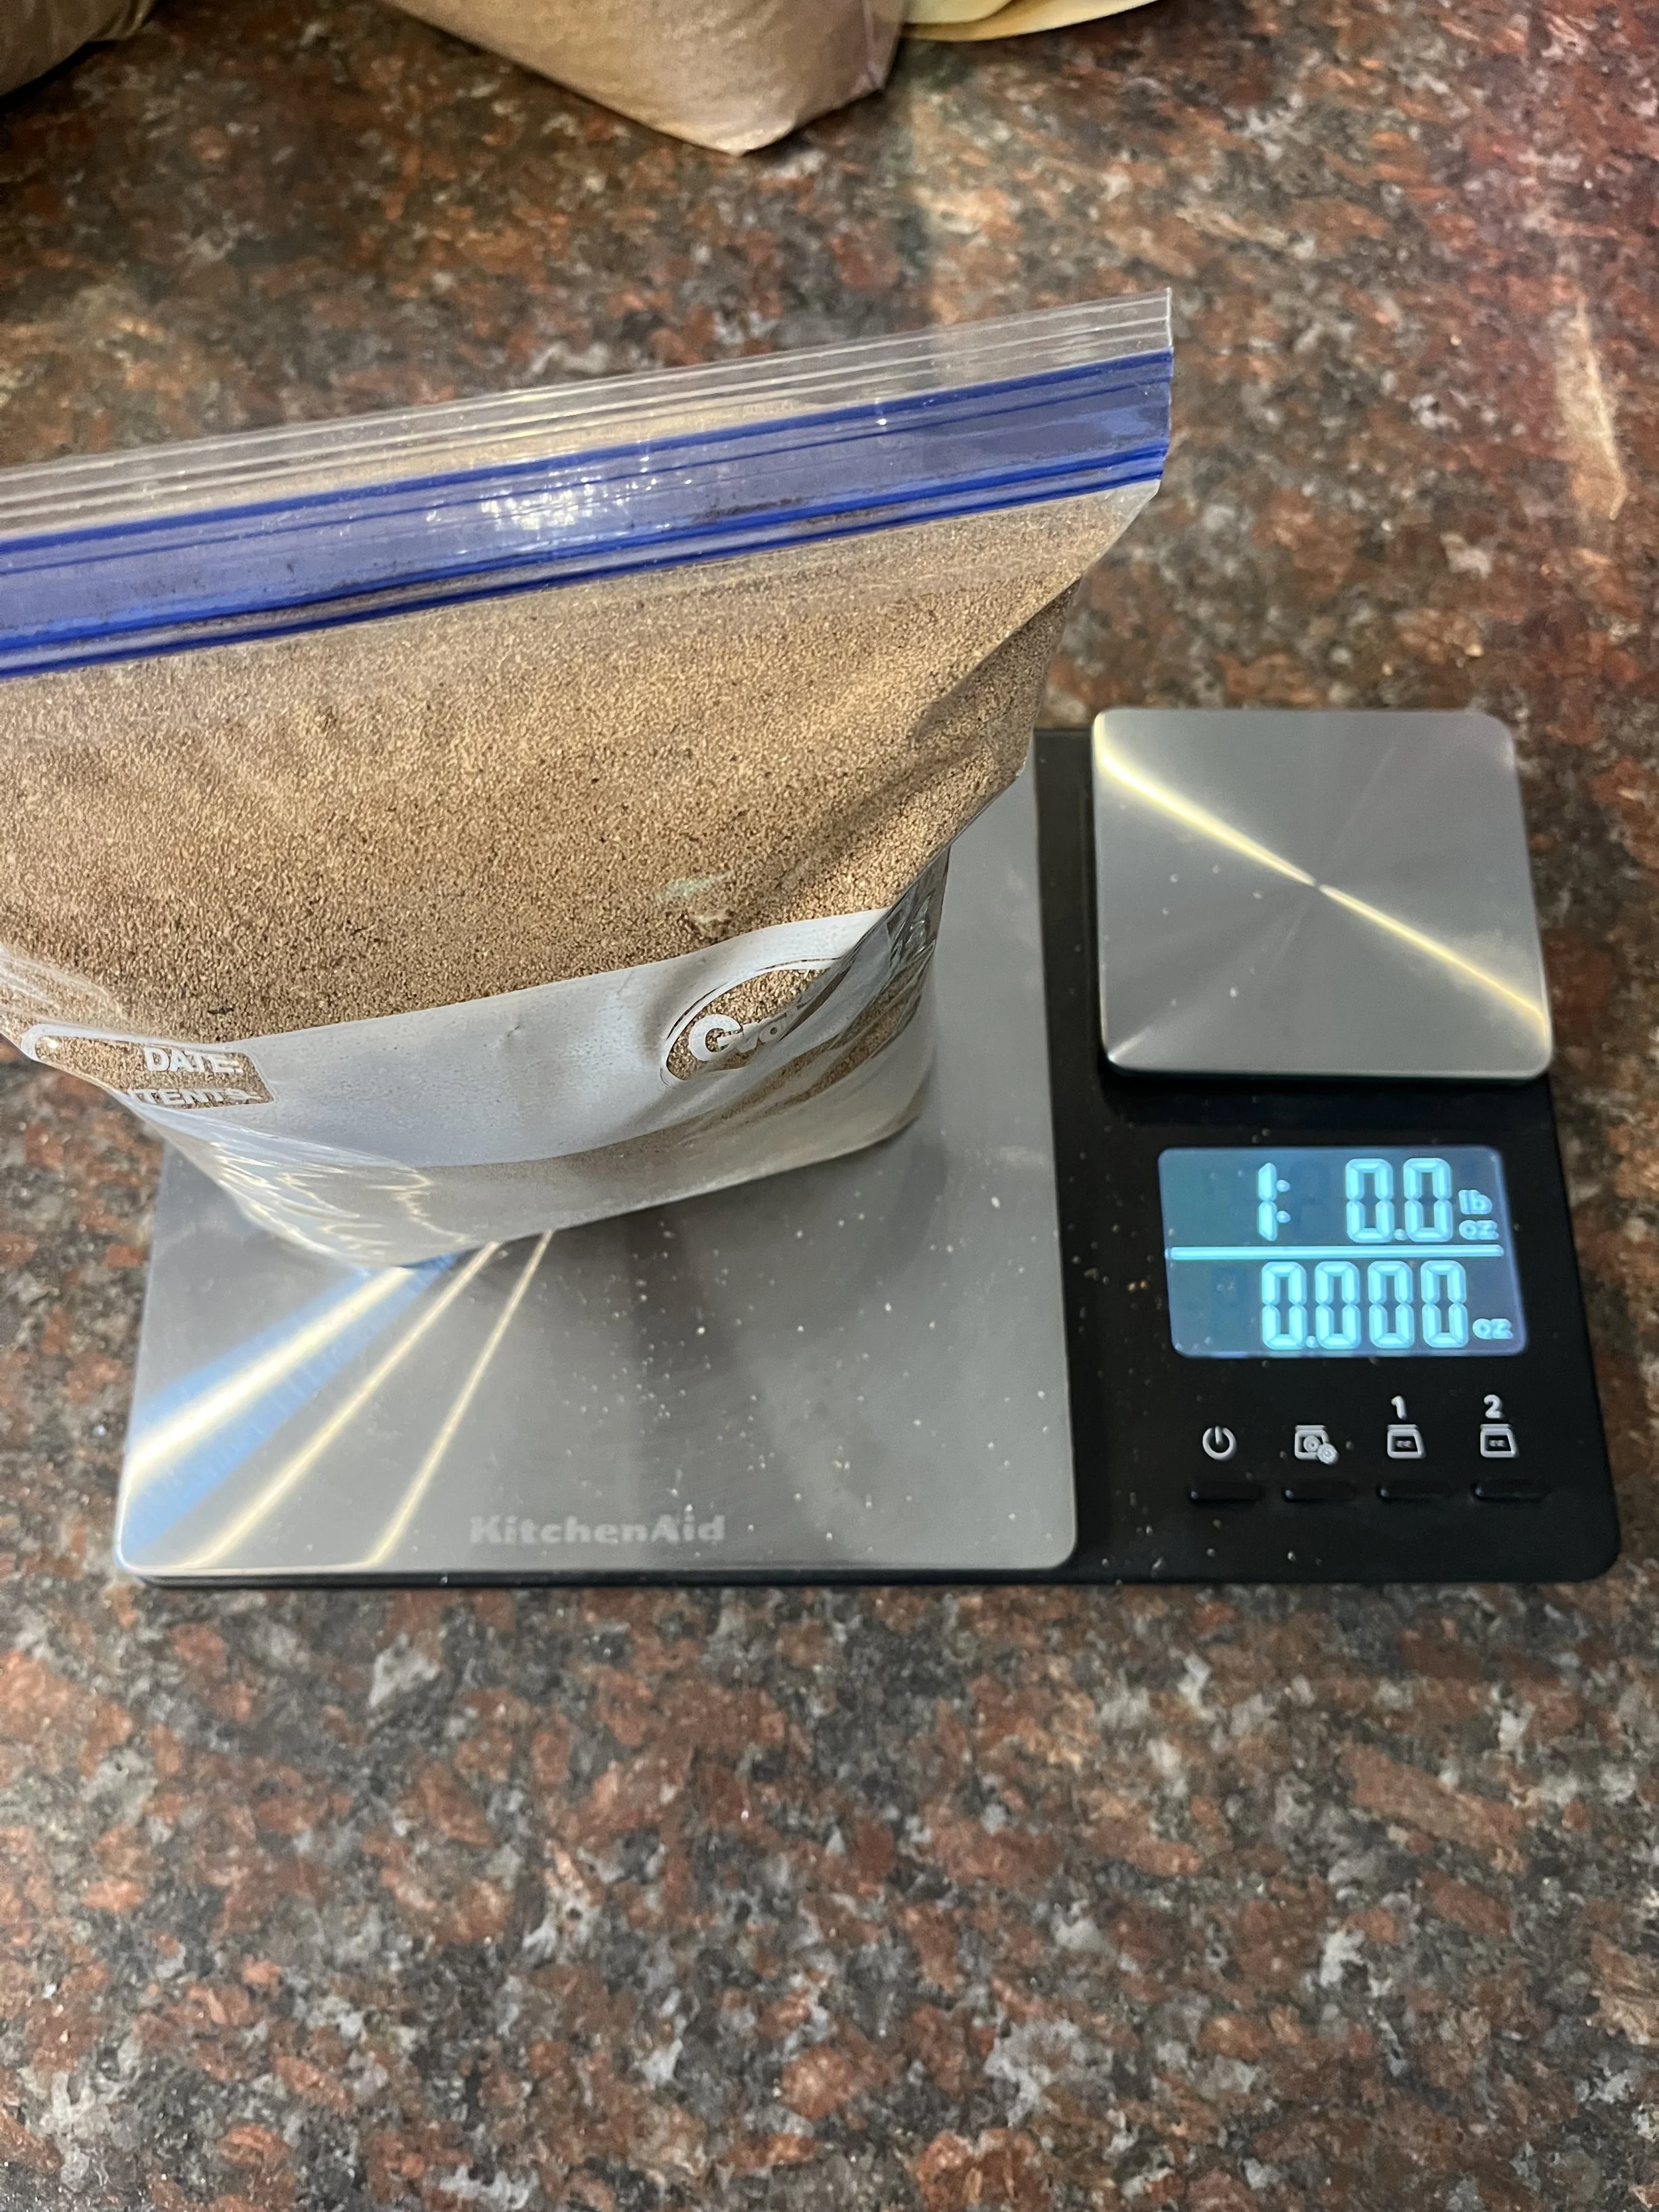
In our dedicated mealworm room, we use ten-drawer craft carts to separate the life stages. Regular sifting keeps the colony healthy and leaves us with buckets of beautiful, coffee-ground-textured frass. It’s clean, virtually odor-free, and packed with goodness from our locally sourced wheat bran and garden greens.
Tips for Using Mealworm Frass in Your Garden
Ready to give it a try? Here’s how we use it (and how you can too):
Soil building: Work 1–2 cups per square foot into beds before planting—like we’re doing for the loofa tunnel.
Top dressing: Lightly sprinkle around growing plants and scratch in gently.
Seed starting mix: Blend 10–20% frass for a gentle, protective nutrient kick.
Pest-prone crops: Extra love for cucumbers, squash, tomatoes, and yes—loofas!
Now Available in Our Shop!
We’re excited to share our premium mealworm frass with you. It’s harvested fresh from our clean, natural colony, packaged by weight. Wtih the instructions in this blog you are ready to bring your garden or house plants to the next level. Grab a bag (or two!) to boost your own garden the homestead way. You’ll find it in our Squarespace store alongside our mealworms, handmade loofa sponges, plush chickens and dragons, pot holders, canvas bags, and other family-made treasures. Every purchase directly supports our small Michigan family as we grow toward greater self-sufficiency and sustainable practices.
Have you tried insect frass in your garden yet? We’d love to hear your results or answer questions.
Happy, healthy soil to you,
The 9 Pines Homestead Family
Handmade with Love: Plush Chickens, Dragons, and Homestead Crafts from Our Daughters’ Hands
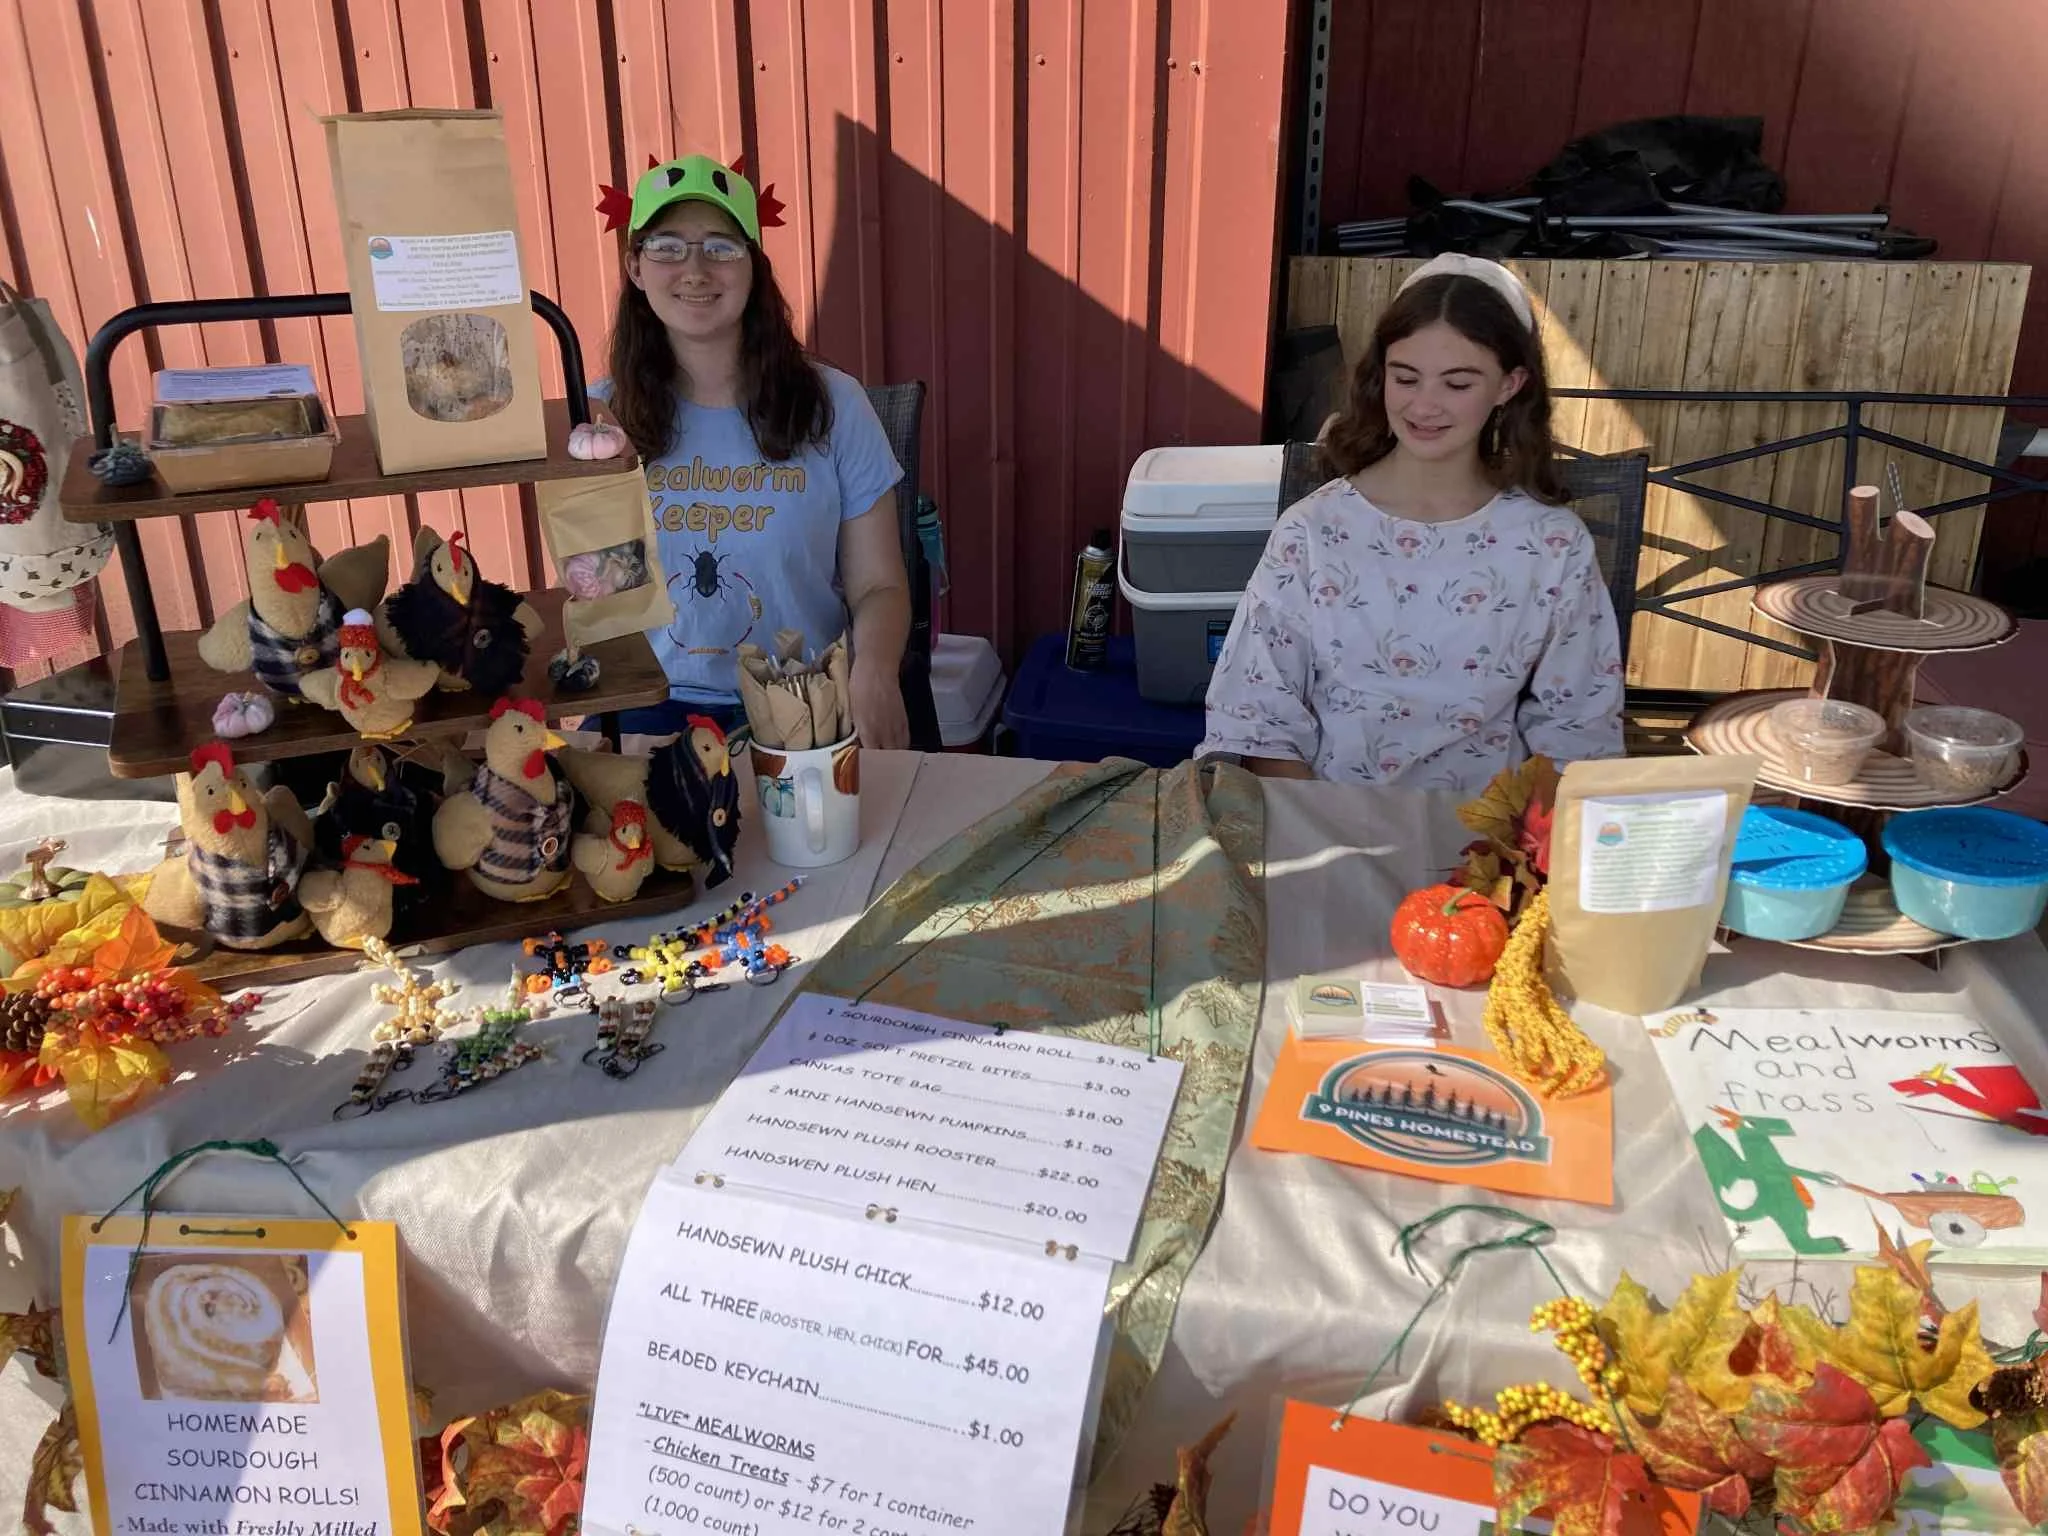
Our handmade crafts from plush chickens, to tote bags, pot holders, and creative projects.
Hello, friends! From our cozy 9-acre homestead in White Cloud, Michigan, we’re always finding new ways to turn creativity into something tangible. While we tend to chickens, pigs, mealworms, and gardens, our daughters have quietly added their own little corner of the family business: a growing collection of handmade crafts that bring smiles to everyone who sees them. At the heart of it all are the plush chickens—soft, huggable, and full of personality. Each one is sewn by hand, stuffed with care, and finished with little details that make them one-of-a-kind. Some wear tiny bandanas, others have floppy combs or embroidered wings. They started as a fun project to match our real flock roaming the property, but they quickly became a favorite item in our Squarespace shop.
A Children’s Book in the Works: “This is What Happens When a Dragon…”
Our Bridgette, has taken things a step further with her very first children’s book, titled This is What Happens When a Dragon…. It’s a sweet, funny story about a friendly dragon and his princess best friend as they tackle everyday adventures together—opening stubborn pickle jars, setting up a campsite, attending school, and more. What makes the book extra special are Bridgette’s original colored-pencil illustrations. The dragon is big, scaly, and a little clumsy, while the princess is along for the ride. Together, they turn ordinary moments into something magical. Bridgette is still putting the finishing touches on the story and artwork, but we’re already excited to share it with the world when it’s ready.
Plush Dragons Join the Flock
Inspired by the book, our oldest daughter, Addi, has started sewing plush versions of the main characters—the dragon and the princess herself (in soft, cuddly form). These dragons are the perfect companions to our plush chickens: same careful hand-stitching, same high-quality materials, but with wings, tails, and expressive faces that match Bridgette’s drawings. Addi also continues to make the chickens that started it all, giving each one its own unique flair.
Beyond Plush: Canvas Bags, Pot Holders, and More
The girls aren’t stopping at stuffed animals. They’ve expanded into practical, everyday items that carry the same handmade charm:
Sturdy canvas tote bags, perfect for library books, farmers’ market hauls, or groceries
Quilted pot holders and oven mitts made from upcycled fabrics and insulated batting
Small drawstring pouches and other useful bits and pieces
Every item is designed to be used and loved for years. We purposely keep production small—no mass inventory here. Each piece is made in limited batches, often one at a time, so you’re getting something truly unique rather than something churned out on an assembly line.
Why Handmade Matters to Us
As a homeschooling family, these projects are more than just a way to earn a little income—they’re lessons in creativity, patience, math (measuring and patterning!), and entrepreneurship. The girls handle everything from choosing fabrics and sketching designs to stitching, stuffing, and photographing the finished pieces for the shop. When you buy one of their creations, you’re not just getting a plush chicken, dragon, or tote—you’re supporting young artists learning to turn their ideas into reality. You’re also getting an item made with care, attention, and a whole lot of homestead heart. We add new pieces to the shop as they’re finished, so inventory changes often. If you see something you love, it’s best to grab it before it finds its forever home!
Thank you for supporting our daughters’ handmade journey. We can’t wait to show you the finished children’s book and the plush dragons that go with it. In the meantime, stop by our Squarespace store and take a peek at what’s available today. Made with love (and a few late-night sewing sessions),
The 9 Pines Homestead Family
Growing Our Own Loofa Sponges: From Seed to Sustainable Scrub on Our Michigan Homestead
Growing loofa sponges
Hello again, homestead friends! Here on our 9-acre wooded property in White Cloud, Michigan, we’re always looking for ways to grow or make more of what we use every day. One of our most exciting experiments this past year was growing loofa (also spelled luffa) sponges—yes, those natural, scrubby sponges you see in eco-friendly stores are actually dried gourds from a vigorous vine! What started as a small trial run with just two plants has us dreaming big for 2026. If you’ve ever wanted to ditch plastic shower poofs and synthetic dish sponges for something homegrown, biodegradable, and truly sustainable, read on. We’ll share our first-year lessons, our plans for a full-blown loofa tunnel, and tips so you can grow your own—no matter where you garden.
Our First Loofa Adventure: Two Plants, Twenty Sponges
This past spring, we decided to test the waters (pun intended) with loofa gourds. We started seeds indoors in early March under grow lights, then transplanted the seedlings outside once the danger of frost passed in late May. To our delight, those two vines took off! They climbed our makeshift trellis, flowered profusely, and produced around twenty mature gourds by fall. Harvesting and processing was a family affair. In September, we picked the gourds once the skins turned yellow-brown and felt light. We let them dry fully on racks in our barn through October and November. By December, they were ready for the fun part: peeling off the crisp outer skin, shaking out the seeds (hundreds per gourd!), and giving the fibrous interior a good rinse and soak to remove any remaining sap. The result? Beautiful, all-natural sponges that are gentle yet effective for showering, washing dishes, or even light household scrubbing.We’ve completely switched to our homegrown loofas at home—no more plastic mesh poofs or cellulose sponges heading to the landfill. They last for months, compost beautifully when worn out, and feel so satisfying knowing we grew them ourselves.
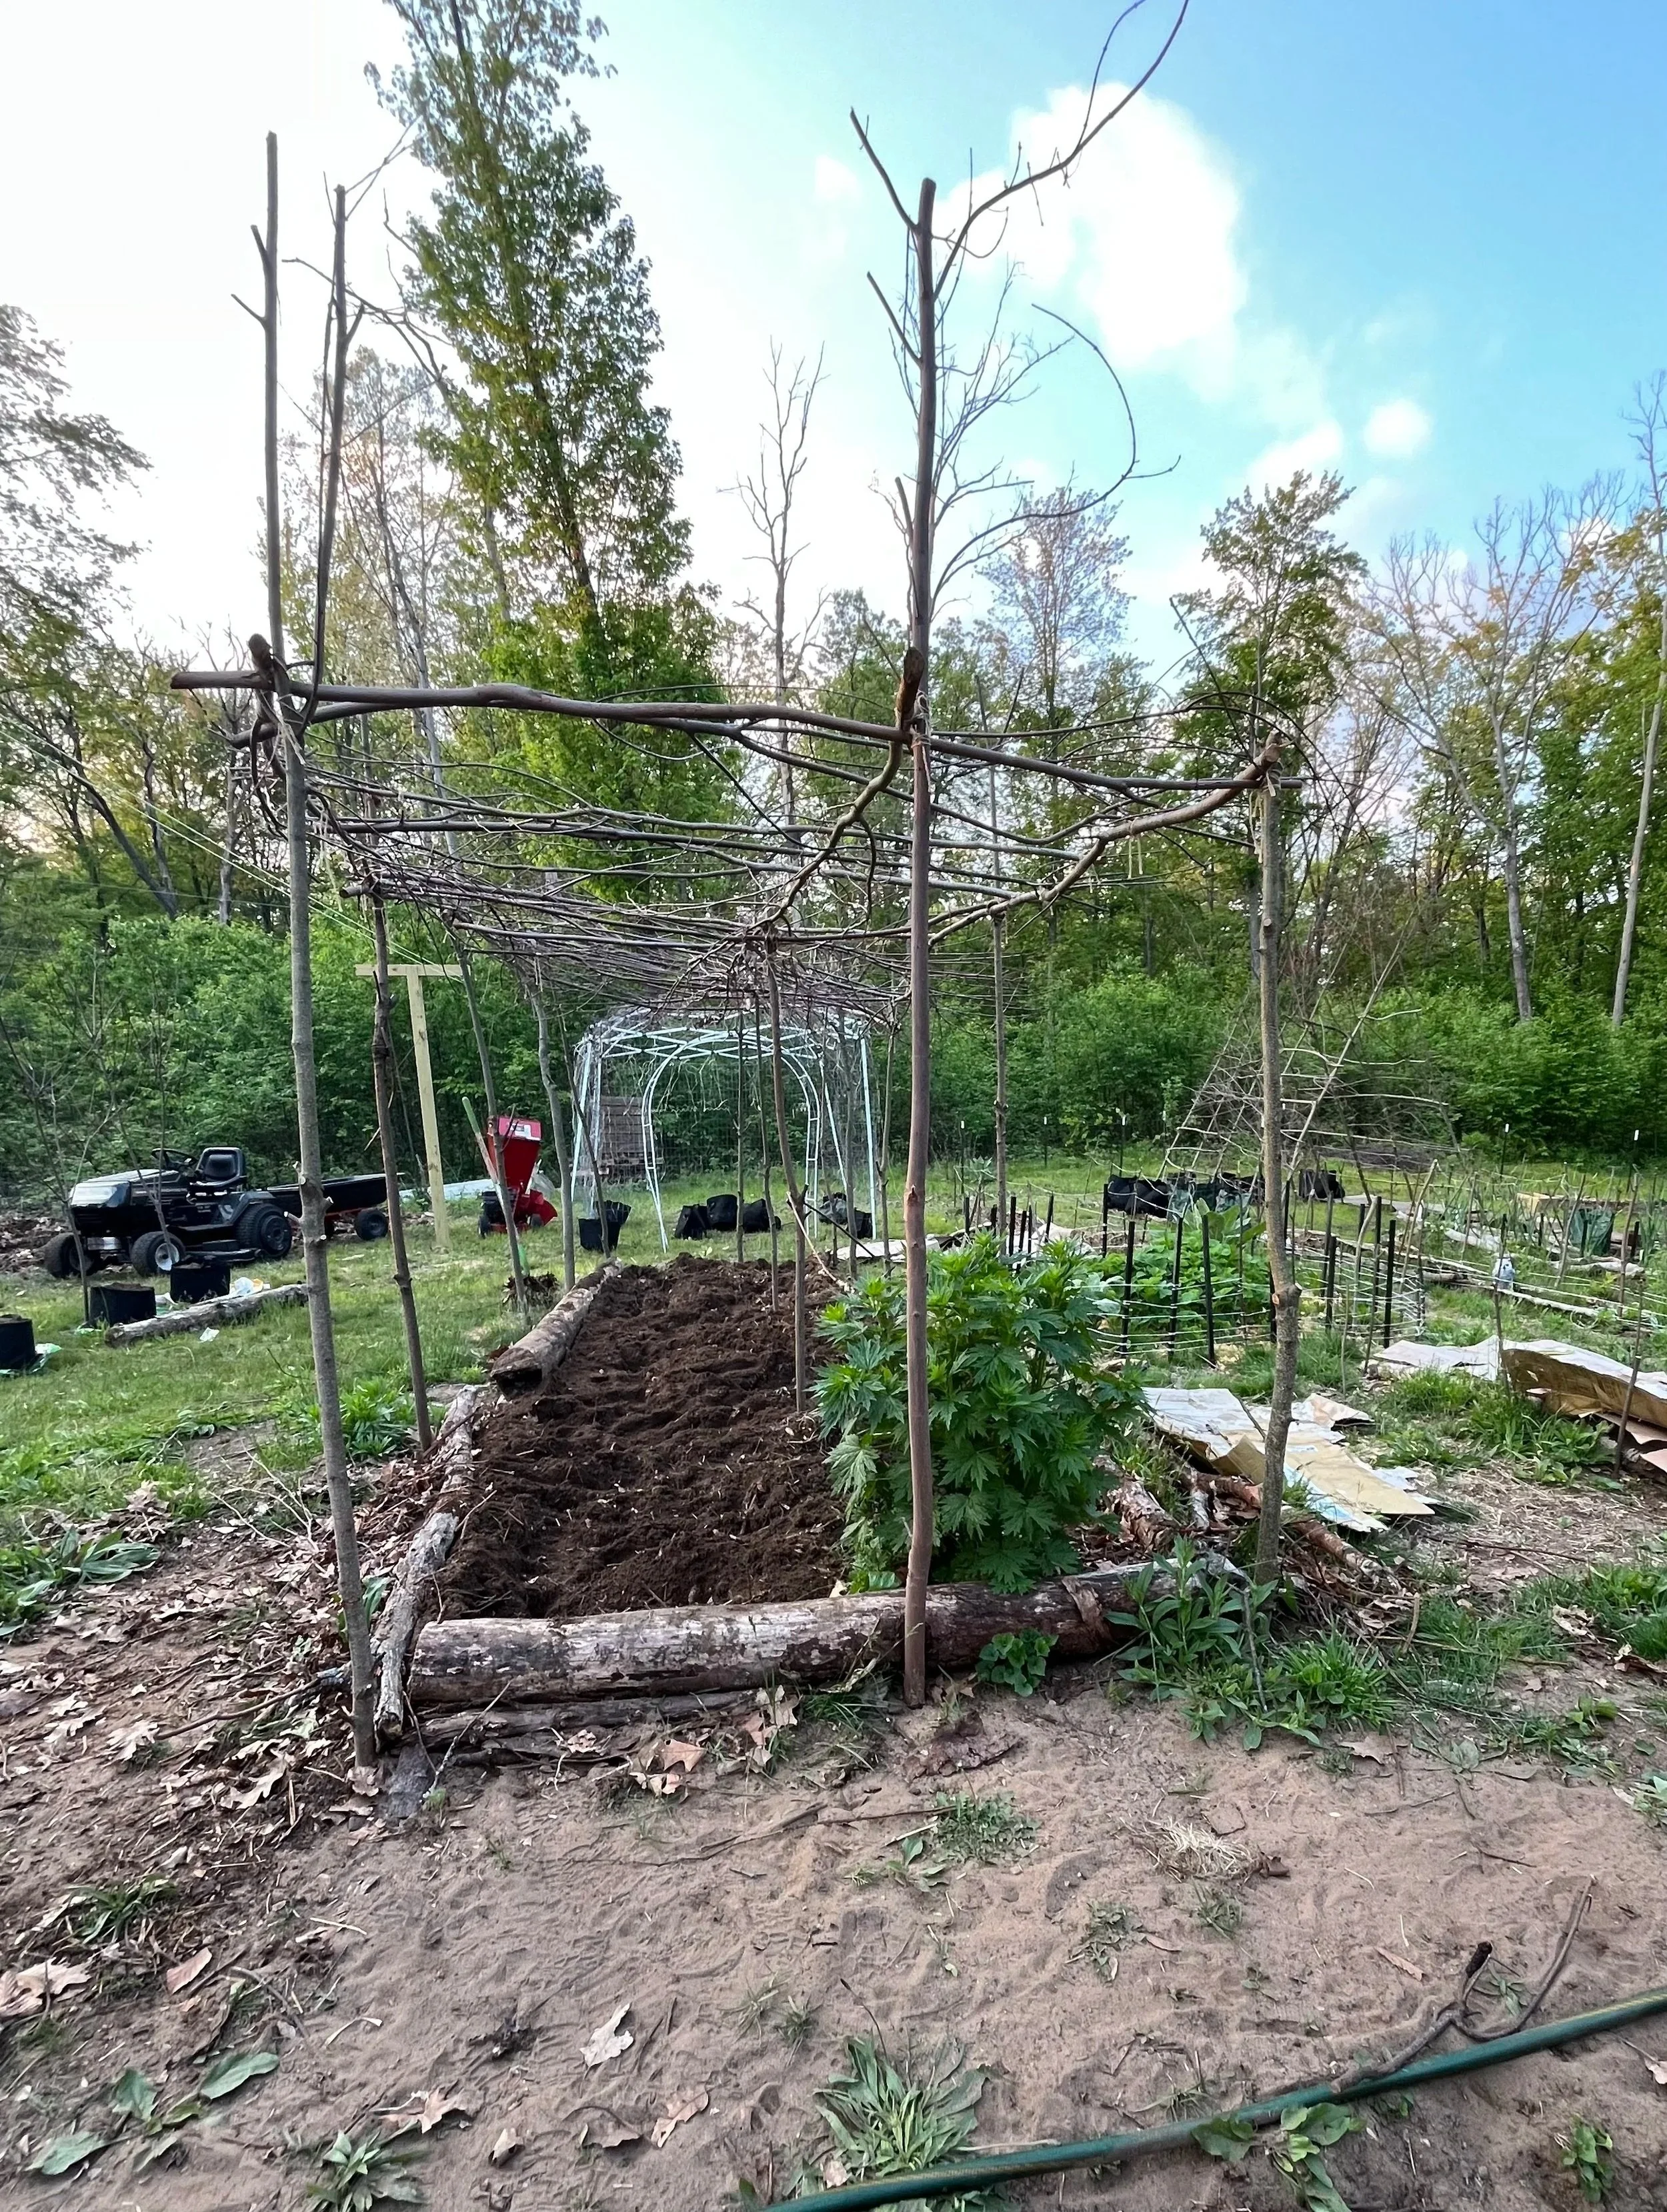
Scaling Up: Building a Loofa Tunnel for 2026
After that successful trial, we’re going all-in this coming season. Our big project is creating two long raised beds flanked by arched cattle panels to form a shaded loofa tunnel—perfect for the kids to play under and for us to walk through while harvesting. We’re planning space for about twenty healthy plants, which should yield hundreds of sponges if the weather cooperates.
Soil Prep: Powered by Our Homestead Cycle
We’re firm believers in closing the loop on our small farm. The raised beds will be filled with:
Rich leaf compost from last year’s piles
Well-aged manure from our feeder pigs and chickens
Mealworm frass from our thriving farm (that nutrient-packed “waste” is loaded with balanced N-P-K and chitin that naturally boosts plant defenses against pests)
We’ll work all these amendments deep into the soil this winter and early spring. No synthetic fertilizers or pesticides here—just nature’s best.Timeline for Michigan’s Short SeasonMichigan gardeners know frost can bookend our summers, so timing is everything:
Early to mid-March: Start seeds indoors in soil blocks or pots under lights. Loofa seeds need warmth (75-85°F) to germinate reliably.
Late May to early June: Harden off and transplant seedlings once soil temps stay above 60°F and night lows are consistently above 50°F.
June–August: Watch the magic happen! The vines will rocket up the cattle panel arches, producing bright yellow flowers that attract pollinators. We’ll hand-pollinate if needed to ensure good fruit set.
September: Harvest mature gourds as they lighten and skins toughen.
October–November: Dry on racks in a warm, airy spot.
December: Peel, clean, and process sponges. Save the best seeds for next year; sell or share the rest.
Tips for Growing Your Own Loofa SpongesReady to try this rewarding crop? Here’s what we’ve learned so far:
Give them support: Loofa vines grow 15-30 feet long. Strong trellises, arches, or fences are a must—cattle panels are inexpensive and sturdy.
Full sun and heat: They love hot summers. If your season is short like ours, black plastic mulch helps warm the soil.
Water consistently: Deep, regular watering prevents bitter fruit and encourages vigorous growth.
Pollination matters: Bees adore the flowers, but in low-bee years, gently brush male flowers onto female ones (the ones with tiny gourds at the base).
Patience when drying: Don’t rush peeling. Fully dry gourds rattle with seeds and peel easily.
Seed saving: One gourd can give you 200-500 viable seeds—plenty to share or expand your patch.
From Garden to Shop: Sharing the Harvest
Any sponges beyond what our family needs will be available in our Squarespace store alongside our mealworms, handmade plush chickens, crafts, and other homestead goodies. Each sponge is 100% natural, grown with regenerative methods, and packaged plastic-free. Buying one supports a small Michigan family working toward greater self-sufficiency—and helps us fund more projects like mushroom logs and pastured pigs.We can’t wait to walk through our loofa tunnel this summer, surrounded by hanging gourds and buzzing pollinators. Stay tuned for updates (and plenty of photos) as the season progresses!Have you ever grown or used real loofa sponges? Drop a comment below—we’d love to hear your tips or questions. Here’s to another year of growing what we use and using what we grow.
Happy gardening,
The 9 Pines Homestead Family

The Buzz on Our Mealworm Farm: Sustainable Protein from Our Michigan Homestead
The Buzz on Our Mealworm Farm: Sustainable Protein from Our Michigan Homestead
Hello, friends! We're the folks behind our little slice of paradise in White Cloud, Michigan—a 10-acre wooded homestead where we nurture everything from egg-laying chickens and feeder pigs to inoculated mushroom logs and vibrant gardens. Our family is all about living close to the land, using natural methods to grow and create. We craft handmade plush chickens and other fun items, and we even grow our own loofa sponges with organic fertilizers and pesticides straight from nature. Today, we're excited to dive into one of our favorite projects: our mealworm farm. What started as a simple way to boost our chickens' diet has blossomed into a thriving part of our small business. If you're thinking about starting your own mealworm farm—whether for your backyard flock, pet reptiles, fishing trips, or wild bird feeders—we've got tips, insights, and a peek into how we do it sustainably.Why Mealworms? A Family Tradition of Self-SufficiencyOur journey with mealworms began out of necessity and curiosity. With a flock of happy, free-ranging chickens, we wanted to provide them with a nutrient-packed treat that was better than store-bought options. Mealworms are loaded with protein, fats, and essential amino acids, making them an ideal supplement for egg production and overall bird health. Plus, they're a hit with reptiles like bearded dragons, as fishing bait for panfish, or even scattered in bird feeders to attract songbirds.As a family, we value sustainability, community, and quality. Everything we do on our homestead reflects that— from sourcing local wheat bran for our mealworms' bedding to using natural amendments in our gardens. We're not just raising bugs; we're building a cycle of life that supports our animals, enriches our soil, and now, shares high-quality products with you through our Squarespace shop. Our mealworms are raised with care, free from chemicals, and harvested at peak freshness. Buying from us means supporting a small, family-run operation that's passionate about ethical farming and eco-friendly practices.Setting Up Your Own Mealworm Farm: Our Step-by-Step GuideIf you're inspired to start your own mealworm farm, it's easier than you might think! We began small and scaled up, and you can too. Here's how we manage ours, with practical advice to get you going. Remember, mealworms (the larval stage of darkling beetles) thrive in a controlled environment, and the full life cycle—from egg to beetle—takes about 4-6 months under ideal conditions.1. Gather Your Supplies
Housing: We use affordable ten-drawer plastic craft carts (like those from a big-box store). Each drawer separates life stages: one for beetles, one for eggs, several for growing mealworms, and one for pupae. Start with 4-6 drawers if you're just beginning.
Bedding/Substrate: Opt for wheat bran—it's nutritious and affordable. We source ours locally to support Michigan farmers. You'll need about 1-2 inches per drawer. Avoid oats or other grains that might mold easily.
Moisture Source: Water gel crystals (available at pet stores) work wonders without causing dampness issues. We add fresh greens from our garden, like carrot tops or lettuce, for extra hydration and nutrition.
Environment Control: A humidifier keeps humidity around 50-70%, and in Michigan's chilly winters, we use a mini-split heater to maintain 70-80°F in our dedicated "mealworm room." A simple thermometer and hygrometer are must-haves.
Tip for Beginners: Start with 500-1,000 mealworms from a reputable supplier. This gives you a solid colony without overwhelming you.2. Understanding the Life Cycle Mealworms go through four stages: egg, larva (mealworm), pupa, and adult beetle. We actively manage this to keep things efficient.
Beetles and Eggs: Darkling beetles love the dark! Place them in a drawer with fresh wheat bran. They lay hundreds of eggs over 1-2 weeks. We swap the beetles to a new drawer every two weeks, leaving the old one to hatch eggs into tiny mealworms (about 1-2 weeks later).
Growing Mealworms: Once hatched, the babies munch on the bran. When they've eaten most of it (every 2-4 weeks), we sift them out using a fine mesh screen. This separates the mealworms from the frass (manure) and shed skins.
Pupae and Harvest: Set aside 10-20% of mature mealworms to pupate (they curl up and turn white). These become your next beetles. Harvest the rest when they're 1/2 to 1 inch long—perfect size for treats.
Pro Advice: Sifting is key! Do it weekly to remove frass, which prevents mold and keeps your colony healthy. Use gloves if you're squeamish, but honestly, it's fascinating for kids and adults alike.3. Daily Care and Troubleshooting
Feeding and Moisture: Supplement bran with veggie scraps 1-2 times a week. Water crystals provide safe hydration—avoid open water to prevent drowning or bacteria.
Herd Management: Like tending any livestock, check daily for signs of stress (e.g., cannibalism from overcrowding). We "herd" by rotating drawers and culling if needed.
Common Issues: Too dry? Add more crystals or greens. Too humid? Increase ventilation. In cold climates like ours, consistent warmth is crucial—mealworms slow down below 60°F.
Bonus Perk: Frass Magic! That sifted frass isn't waste—it's gold! Packed with balanced nutrients and chitin from shed skins, it boosts plant defenses against pests naturally. We mix it into our garden soil for our loofas and veggies. Try it in your pots or beds for healthier plants without chemicals.
Our Commitment to Quality and Community
At the heart of our mealworm farm is our family's dedication to doing things right. We're a homeschooling crew who believes in teaching our kids responsibility through hands-on work. No shortcuts here—our mealworms are raised humanely, with natural inputs, ensuring they're safe and nutritious for your pets or projects. By selling them as chicken treats, reptile food, bait, or bird feed, we're extending that homestead spirit to you. Plus, every purchase helps us expand our offerings, like our handmade crafts and mushroom logs.Ready to try our premium mealworms or explore more? Head over to our Squarespace site to shop or learn about our other homestead goodies. We'd love to hear from you—drop a comment below if you're starting your own farm, or share your tips!Thanks for joining us on this buggy adventure. Until next time, keep it natural!
Warmly,
The 9 Pines Homestead Family
Hello, friends! We're the folks behind our little slice of paradise in White Cloud, Michigan—a 9-acre wooded homestead where we nurture everything from egg-laying chickens and feeder pigs to inoculated mushroom logs, vibrant gardens, and homemade products.
Our family is all about living close to the land, using natural methods to grow and create. We craft handmade plush chickens and other fun items, and we even grow our own loofa sponges organically without any commercial or chemical fertilizers or pesticides.
Today, we're excited to dive into one of our favorite projects: our mealworm farm.
What started as a simple way to boost our chickens' diet has blossomed into a thriving part of our small business. If you're thinking about starting your own mealworm farm—whether for your backyard flock, pet reptiles, fishing trips, or wild bird feeders—we've got tips, insights, and a peek into how we do it sustainably.
Why Mealworms? Our journey with mealworms began out of necessity and curiosity. With a flock of happy, free-ranging chickens, we wanted to provide them with a nutrient-packed treat that was better than store-bought options. Mealworms are loaded with protein, fats, and essential amino acids, making them an ideal treat for overall bird health, especially during times of stress like when they are molting. Plus, they're a hit with reptiles like bearded dragons, or as fishing bait for panfish, or even scattered in bird feeders to attract bluebirds.
As a family, we value sustainability, community, and quality. Everything we do on our homestead reflects that— from sourcing local wheat bran for our mealworms' bedding to using natural amendments in our gardens. We're not just raising bugs; we're building a cycle of life that supports our animals, enriches our soil, and now, shares high-quality products with you through our Shop. Our mealworms are raised with care, free from chemicals, and harvested at peak freshness. Buying from us means supporting a small, family-run operation that's passionate about ethical farming and eco-friendly practices.
If you are inspired to set up your own mealworm farm, it’s easier than you might think!
Here's how we manage ours, with practical advice to get you going. Remember, mealworms (the larval stage of darkling beetles) thrive in a controlled environment and the full life cycle—from egg to beetle—takes about 4-6 months under ideal conditions.
1. Gather Your Supplies
Housing: We use affordable ten-drawer plastic craft carts (like those from a big-box store). Each drawer separates the four life stages. Start with 4-6 drawers if you're just beginning with 500 to 1,000 mealworms.
Bedding/Substrate: Opt for wheat bran—it's nutritious and affordable. We source ours locally to support Michigan farmers. You'll need about 1-2 inches per drawer. Avoid oats or other grains as these tend to mold easily and are harder to sift through. Your bedding will also need to go through a heat treatment or a long freeze treatment to guard against grain mites.
Moisture Source: Water gel crystals (available at pet stores or online) work wonders without causing dampness issues. We use these and also add fresh greens from our garden, like carrot tops or lettuce, for extra hydration and nutrition.
Environment Control: A humidifier keeps humidity around 50-70%, and in Michigan's chilly winters, we use a mini-split heater to maintain 70-80°F in our dedicated "mealworm room." A simple thermometer and hygrometer are must-haves.
IMPORTANT NOTE: Mealworm sheddings and frass can cause an allergic respiratory reaction. We use full face respirators when sifting or separating each drawer and during prolonged times in the mealworm room.
2. Understanding the Life Cycle: Mealworms go through four stages: egg, larva (mealworm), pupa, and adult beetle. We actively manage this to keep things efficient.
Beetles and Eggs: Darkling beetles love the dark! Place them in a drawer with fresh wheat bran. They lay hundreds of eggs over 1-2 weeks at the bottom of the drawer. We swap the beetles to a new drawer every two weeks, leaving the old one with the old wheat bran to hatch eggs into tiny mealworms (about 1-2 weeks later). Beetles don’t eat the substrate/wheat bran as much as they did during their larva stage. They like more of the fresh veggies and do need moisture or they could start eating their own eggs.
Growing Mealworms: Once hatched, the babies munch on the bran. When they've eaten most of it (every 2-4 weeks), we sift them out using a fine mesh screen. This separates the mealworms from the frass (manure) and shed skins.
Pupae and Harvest: Set aside 10-20% of mature mealworms to pupate (they curl up and turn white). These become your next beetles. Harvest the rest when they're 1/2 to 1 inch long—perfect size for treats. Note: Pupae should be in a single, spaced-out layer or they could suffocate.
Pro Advice: Sifting is key! Do it weekly to remove frass, which prevents mold and keeps your colony healthy. Use gloves if you're squeamish, but honestly, it's fascinating for kids and adults alike. Again, use full face respirators to protect your eyes, nose, and mouth.
3. Daily Care and Troubleshooting
Feeding and Moisture: Supplement bran with veggie scraps 1-2 times a week. Water crystals provide safe hydration—avoid open water to prevent drowning or bacteria.
Herd Management: Like tending any livestock, check daily for signs of stress (e.g., cannibalism from overcrowding). We "herd" by rotating drawers and culling if needed.
Common Issues: Too dry? Add more crystals or greens. Too humid? Increase ventilation. In cold climates like ours, consistent warmth is crucial—mealworms slow down below 60°F.
Bonus Perk: Frass Magic! That sifted frass isn't waste—it's gold! Packed with balanced nutrients and chitin from shed skins, it boosts plant defenses against pests naturally. We mix it into our garden soil for our loofas and veggies. Try it in your pots or beds for healthier plants without chemicals.
Our Commitment to Quality and Community
At the heart of our mealworm farm is our family's dedication to doing things right. We're a homeschooling crew who believes in teaching our kids responsibility through hands-on work. No shortcuts here—our mealworms are raised humanely, with natural inputs, ensuring they're safe and nutritious for your pets or projects. By selling them as chicken treats, reptile food, bait, or bird feed, we're extending that homestead spirit to you. Plus, every purchase helps us expand our offerings, like our handmade crafts and mushroom logs. Ready to try our premium mealworms or explore more? Head over to our Shop page to learn more about our other homestead goodies. We'd love to hear from you—drop a comment below if you're starting your own farm, or share your tips! Feel free to ask questions! Thanks for joining us on this buggy adventure.
Until next time, keep it natural!
Warmly,
The 9 Pines Homestead Family